How to Make Dipped Beeswax Candles
As my collection of wax from our honey bees grows each year, the options are endless as to what I can use it for. One of my favorite projects is making candles. Here’s how to make dipped beeswax candles at home.
We keep a few colonies of honeybees here on our property in Alaska. For the past five years, we have been harvesting our own honey and enjoying the bees’ presence around our home.
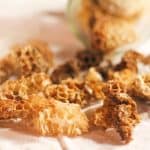
The bees give more than just honey, however. Beeswax is a special treat that we collect and it has so many uses. Homemade bath and body products, wood polish, food wraps, and much more. But probably the most popular way to use beeswax is for candle making.
You will enjoy not only the beauty of handmade candles but also the health benefits of natural beeswax. Read this post for more about this.
There are several styles of pure beeswax candles that you can make at home. Tea lights, votives, and pillars of various sizes are simple to make. You can use almost anything for a container, attach a wick, and pour the melted wax.
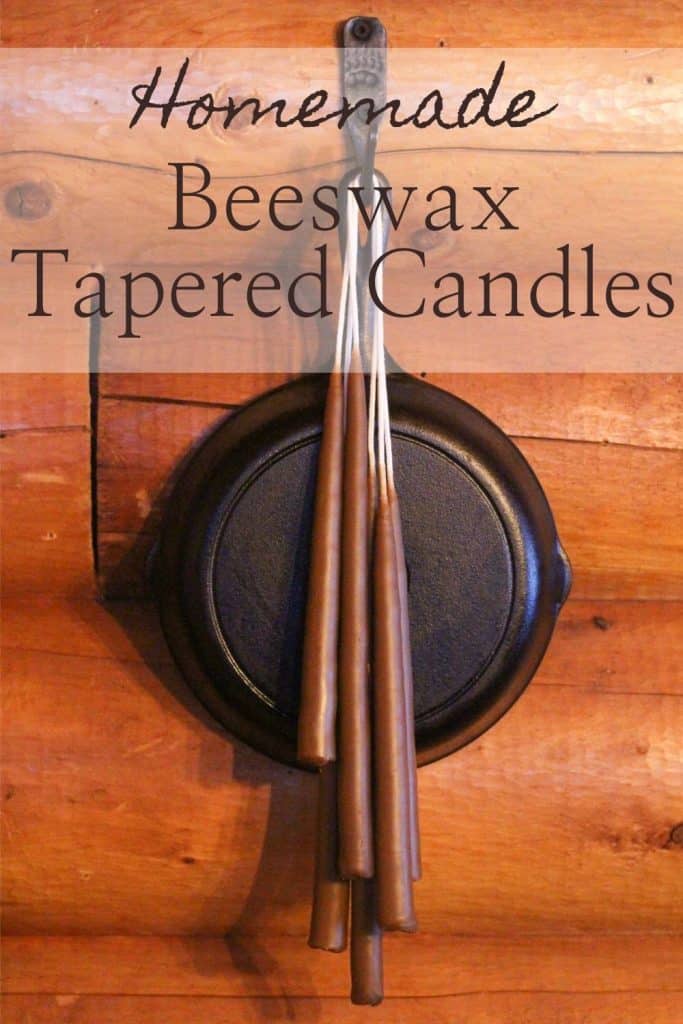
Beeswax taper candles are another option but they take a little more time. I love the old-fashioned beauty of taper candles and all you need is some wick, no container. I like to make several at a time so I have some to display and others to use. Here are the basic steps for how to make dipped beeswax candles at home!
Melt the Wax
The first step is to get the wax melted. If you are using your own wax or wax from a local beekeeper that came directly from the bee hive, you will want to clean it first or there will be debris in your candles. You can follow the simple steps to do that in this post. If you are using purchased wax or beeswax pellets, you will be able to skip this step.
To melt the wax, you will want to set up a double boiler. Direct heat can cause the wax to scorch. I am fortunate to have a beekeeper friend who has an amazing homemade wax pot that she generously allows me to use.
It’s a double boiler with a wax holder in the center and space all around that to hold water. Then it sits on top of the wood stove and the heat will warm the water which will melt the wax.
This is a long process but I enjoy doing it how I imagine it would have been done a long time ago! This batch took over ten hours of sitting on the wood stove before the wax was completely melted and ready for dipping.
Your set-up doesn’t have to take this long! I recommend using a countertop burner as a heat source so you don’t have to worry about getting wax all over your kitchen stove and having to clean it up. Place some parchment paper under the burner so that any drippings won’t go all over your countertop. Just keep in mind how messy wax can be and how difficult to clean up once hardened.
Place a large pot on the burner and set a deep, heat-proof jar or metal container in the pot. Fill the pot with water and bring to a boil. Chop the wax into chunks and place in the jar. Keep an eye on it while it’s melting and add more water to the pot if necessary as it evaporates.
Have another large jar or metal can next to the burner filled with cold water. This will be used to dip the candles in after dipping them in the melted beeswax to cool them quickly.
You can add pure essential oils to the melted wax if you desire. However, I prefer the natural scent of pure beeswax.

Prepare the Wick
You will want to purchase good quality, thick, cotton candle wicks. The wick I use came recommended by fellow beekeepers, #4 square braid cotton wick. I purchase it in the 75-foot rolls to have plenty on hand.
You might not think that wick quality is important but I have learned that it is! Your candles will burn so much more efficiently with a nicer wick.
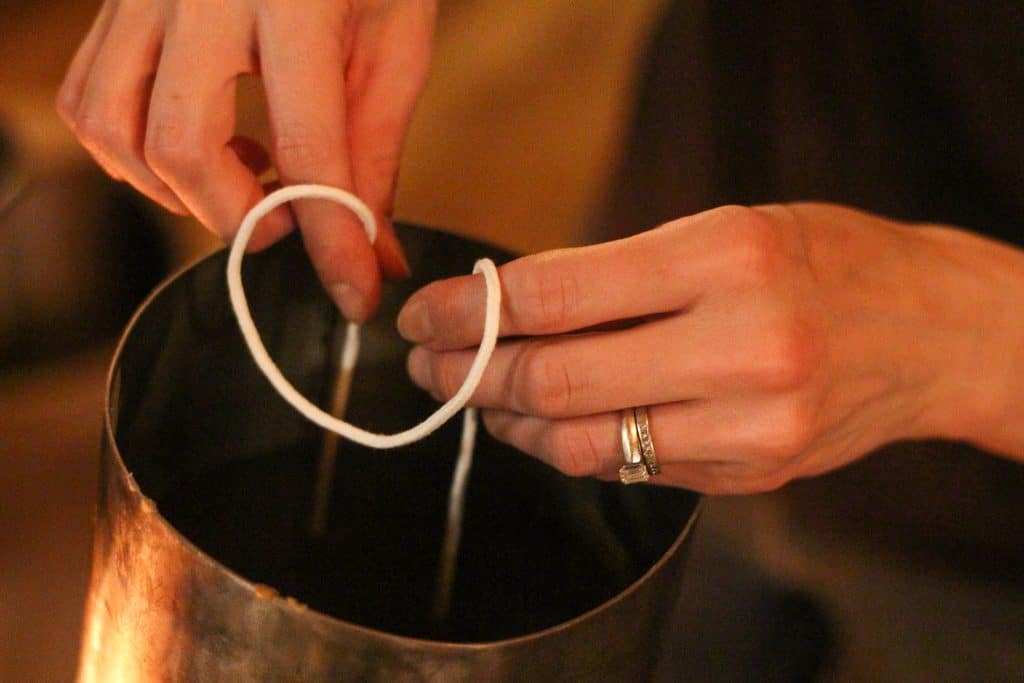
Cut the wick into 36-inch long pieces, or shorter depending on the length of the candles you want. The number of candles you can make will depend on how much wax you have.
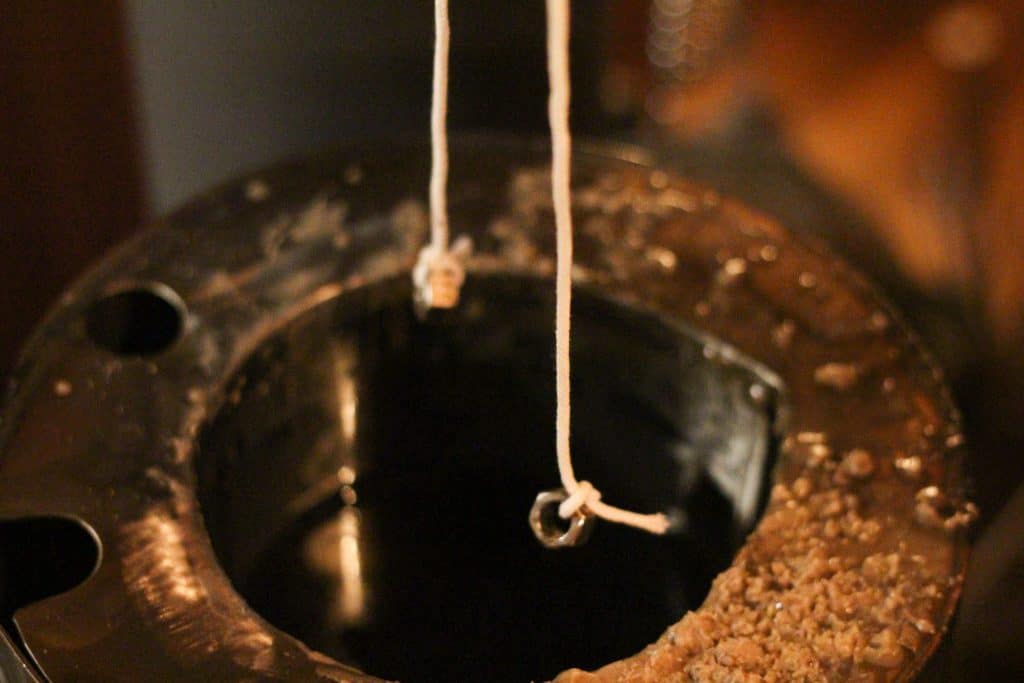
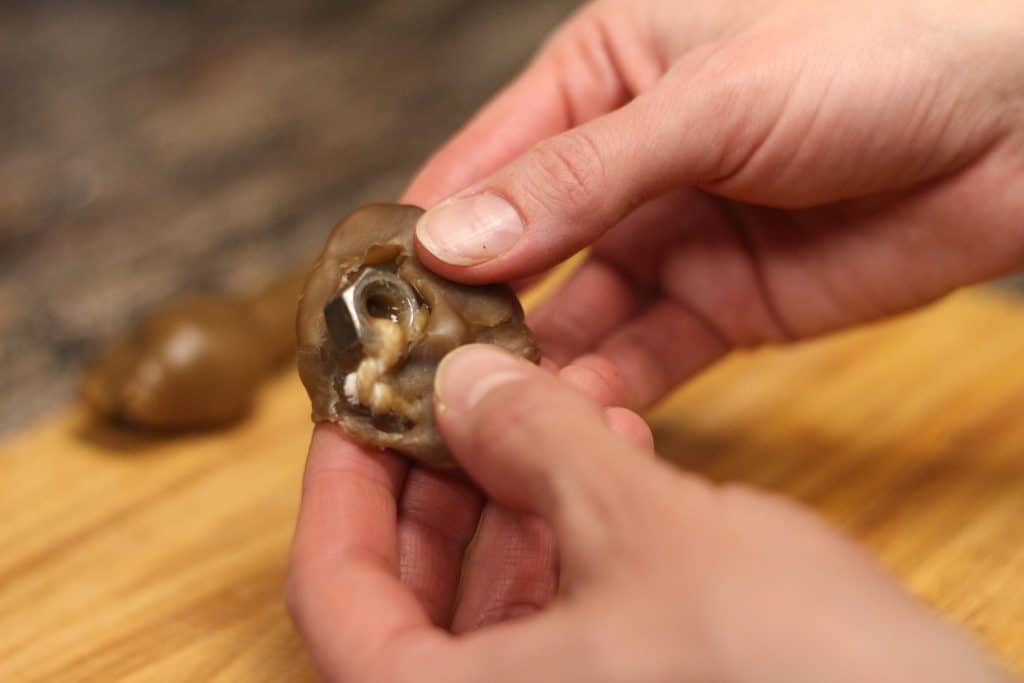
Tie a metal washer or a hex nut to each end of the wick. I borrow them from my husband’s tool chest! These will help weigh the wick down to make your candle straighter.
How to Make Dipped Beeswax Candles
Once your wax is melted, you have a jar of cold water nearby, and the wick is prepared, it’s time to make your own candles!
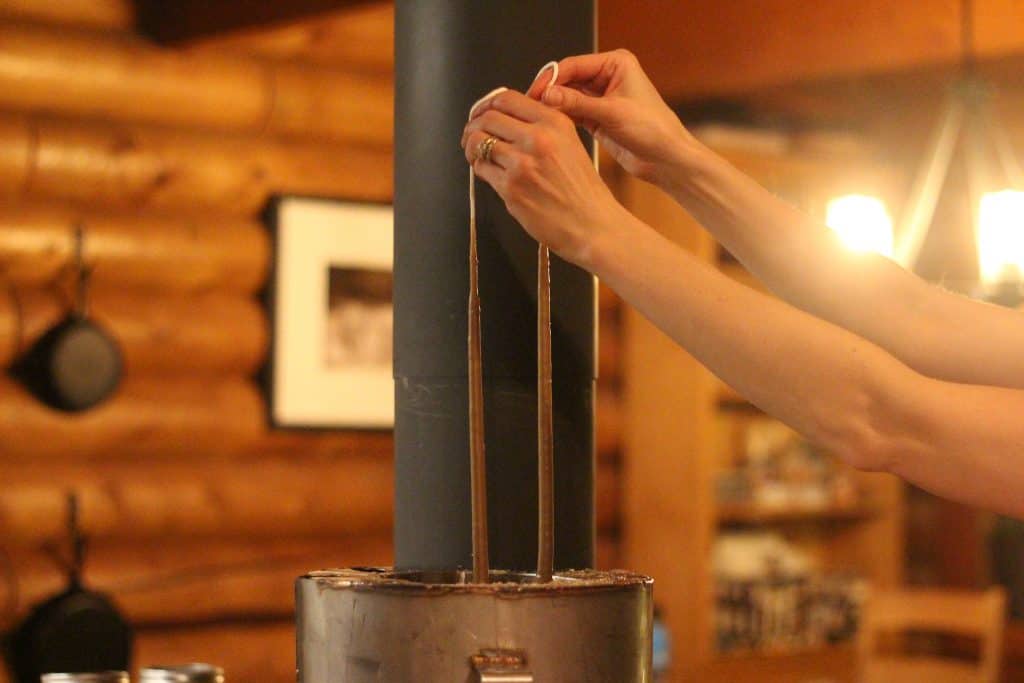
For the first dip, hold the wick in both hands so there’s an equal amount hanging down on each side. Quickly lower the two ends all the way down into the hot wax and just as quickly pull them back up.
Dip both ends all the way into the water and right back up.
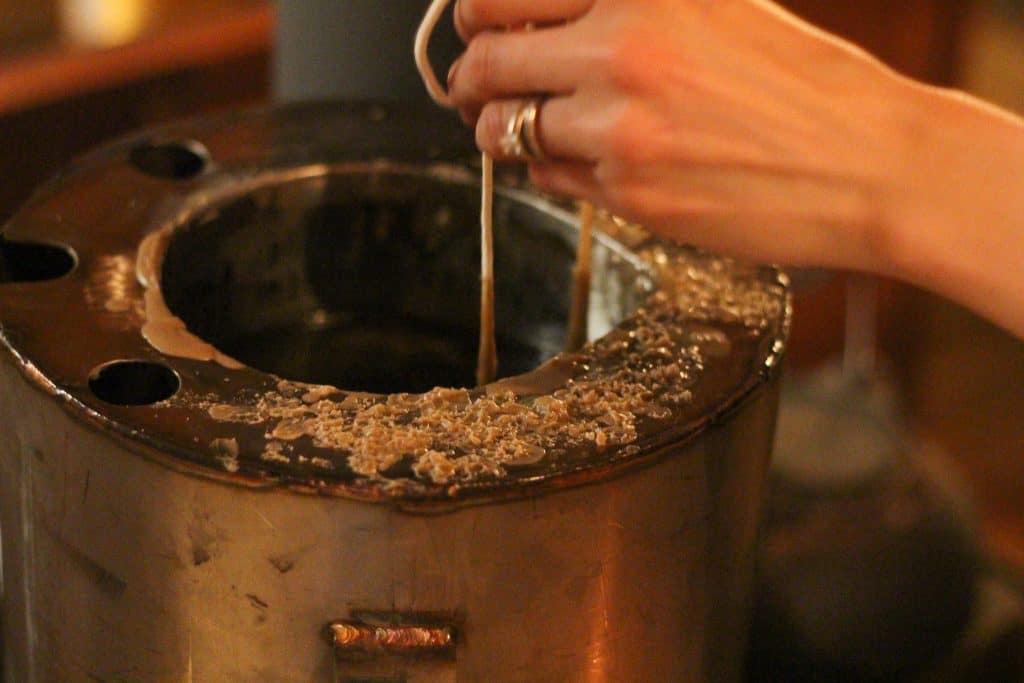
Take your fingers and gently tug on each hex nut to make sure that the wick is pulled straight. Gently straighten any lumps in the wax with your fingers while it is still pliable.
Once you are satisfied with the straightness of the wick, dip it quickly, down and right back up, into the melted wax. Then dip quickly again into the water.
Double-check to make sure the wick is still straight and that there are no lumps. If there are, simply use your fingers to gently straighten it out again. It’s easiest to do this before the candle gets too thick.
Continue the dipping process in the wax then the cool water and repeat several times until the candles are the thickness that you prefer. I average twelve dips when making my candles.
Don’t worry about the build-up on the hex nuts, you will remove them later.
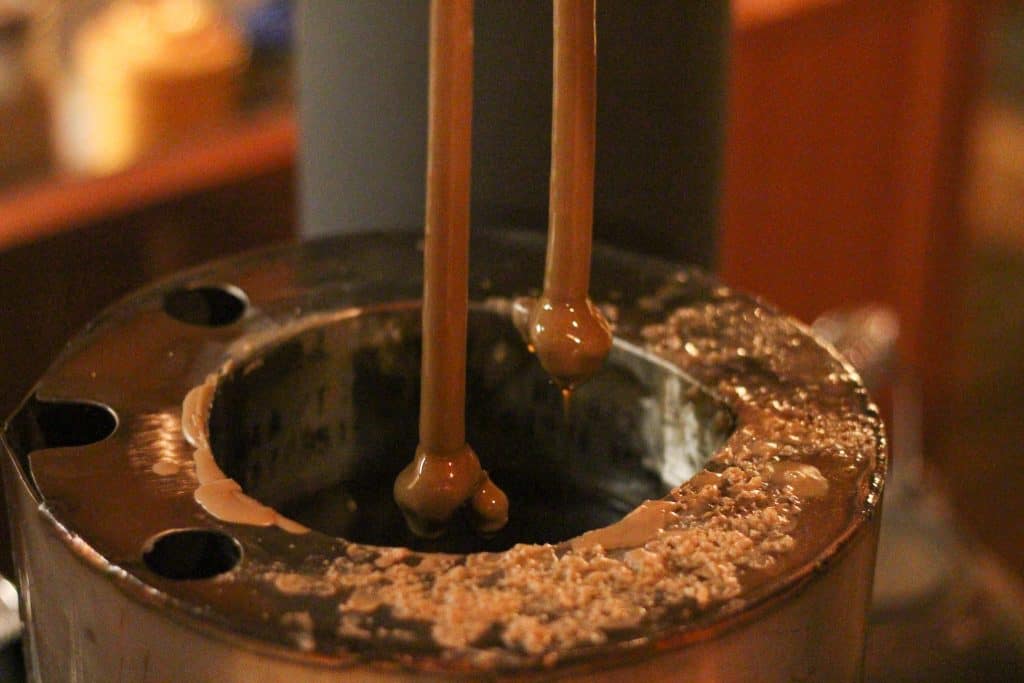
Be sure to let any water droplets drip off before placing the candles back into the wax. You don’t want a bunch of water getting into your wax. If you notice any little water droplets on the candles, carefully dab them with your fingers or you will get little bumps in your candles.
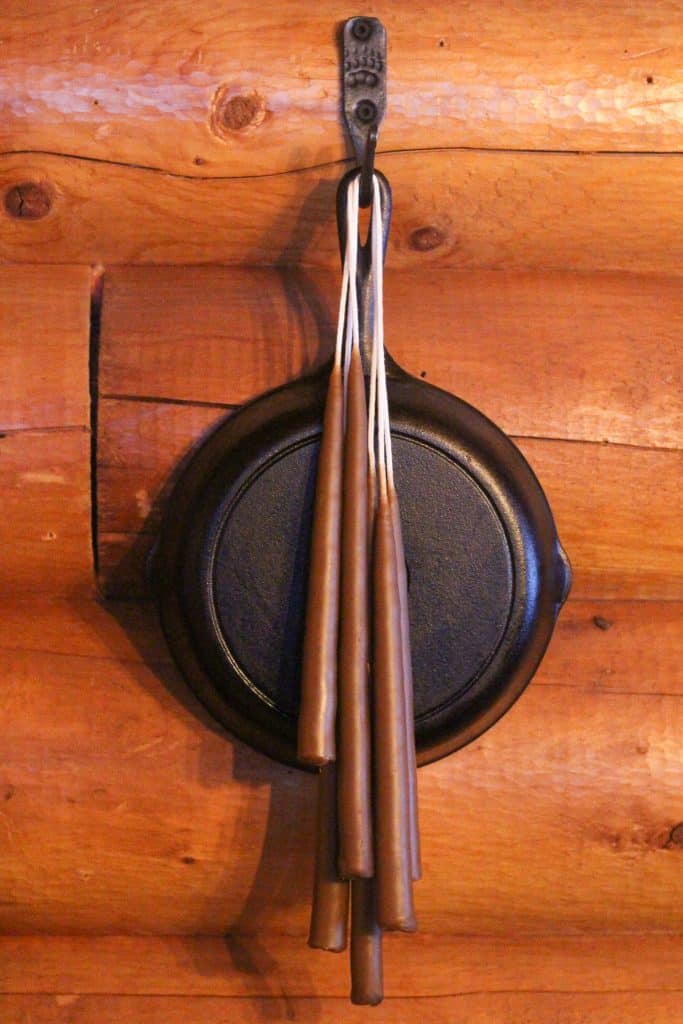
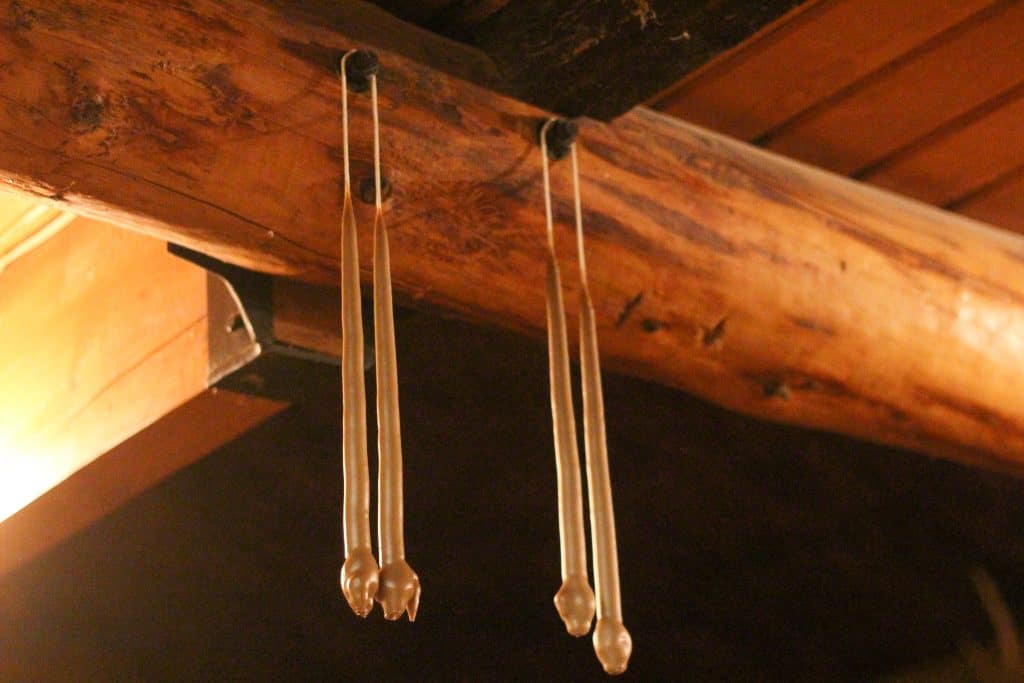
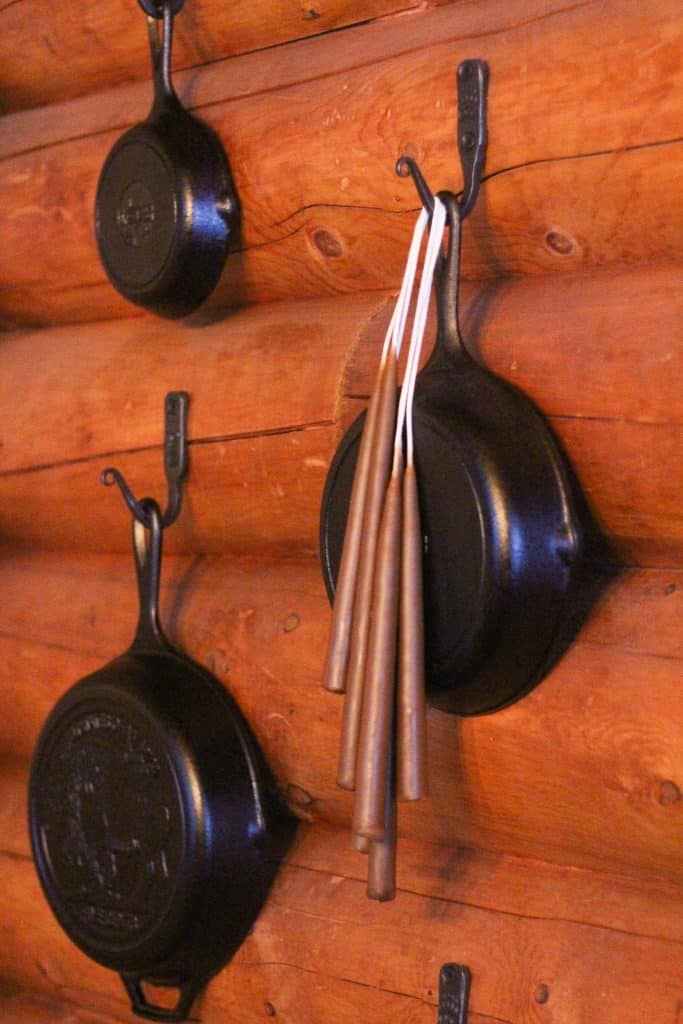
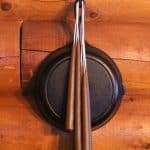
Once you are satisfied with the thickness of your candle, hang it up to cool off a bit. You can use hangars on cabinet handles to hang the candles from. Or tie a small rope from one spot to another, like a clothesline. We have large bolts sticking out of our logs so I just use those.
Finishing the Candles
Once the beeswax tapers have cooled for a few minutes but are still warm, take the candles down and lay them on a flat surface. Using a knife or scissors, cut off the bottom of the candle, right above the hex nut.
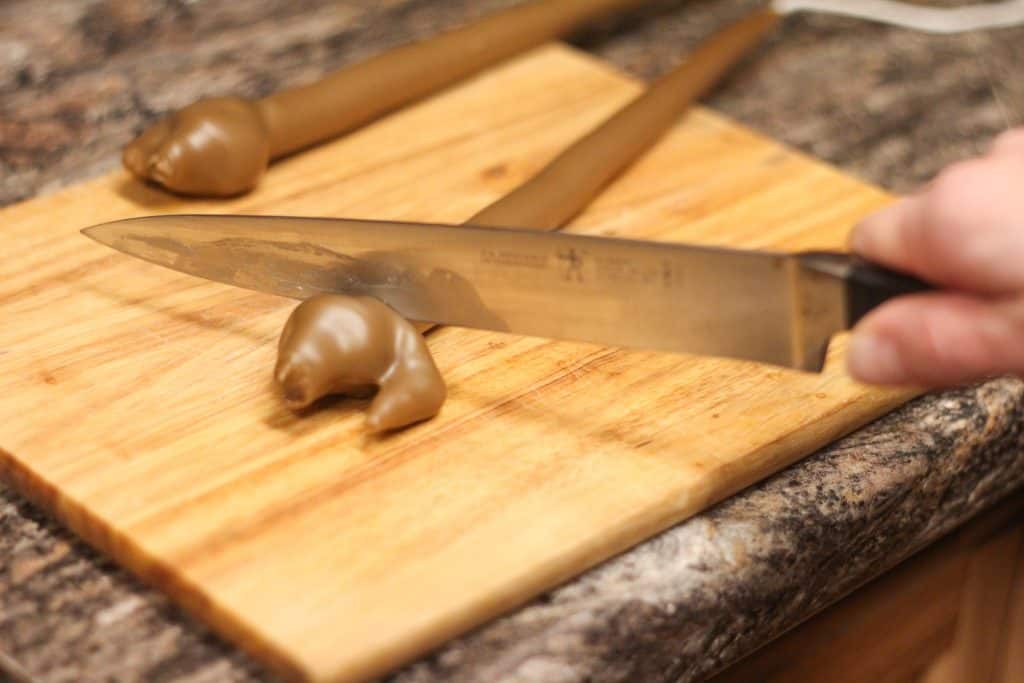
Use your fingers to smooth out the bottom of your candles carefully. Then stand them upright, and press the bottom on a flat surface to make it straight. Hang them back up to continue cooling.
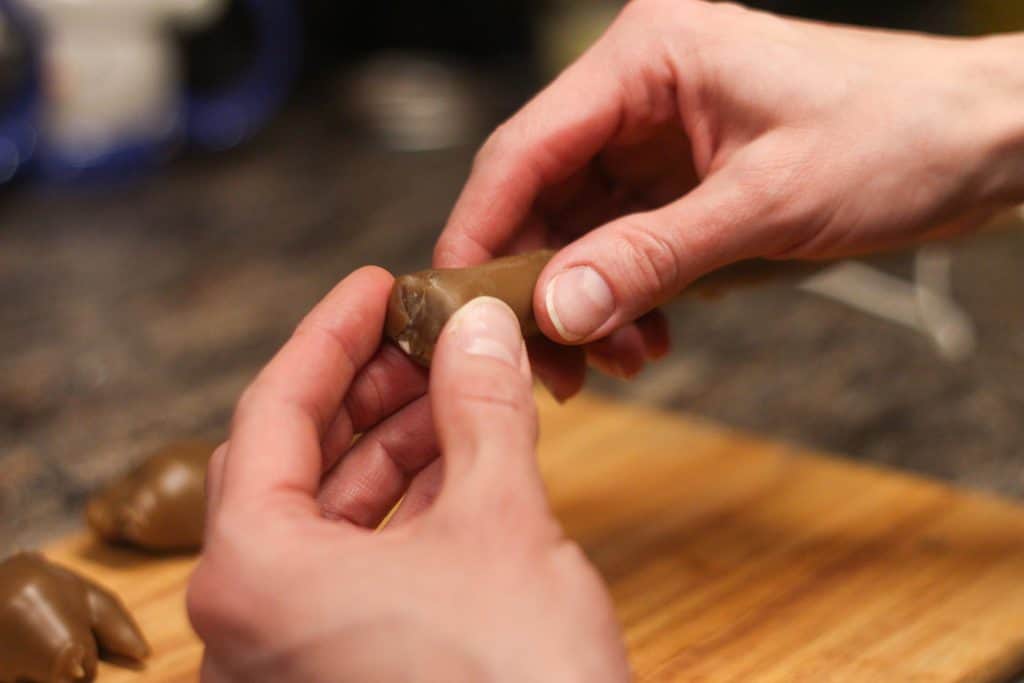
Now you can remove the hex nut from the wax to reuse it! Remove the piece of wick still attached to it and throw it away. Put the wax back into your wax pot to be melted and used again.
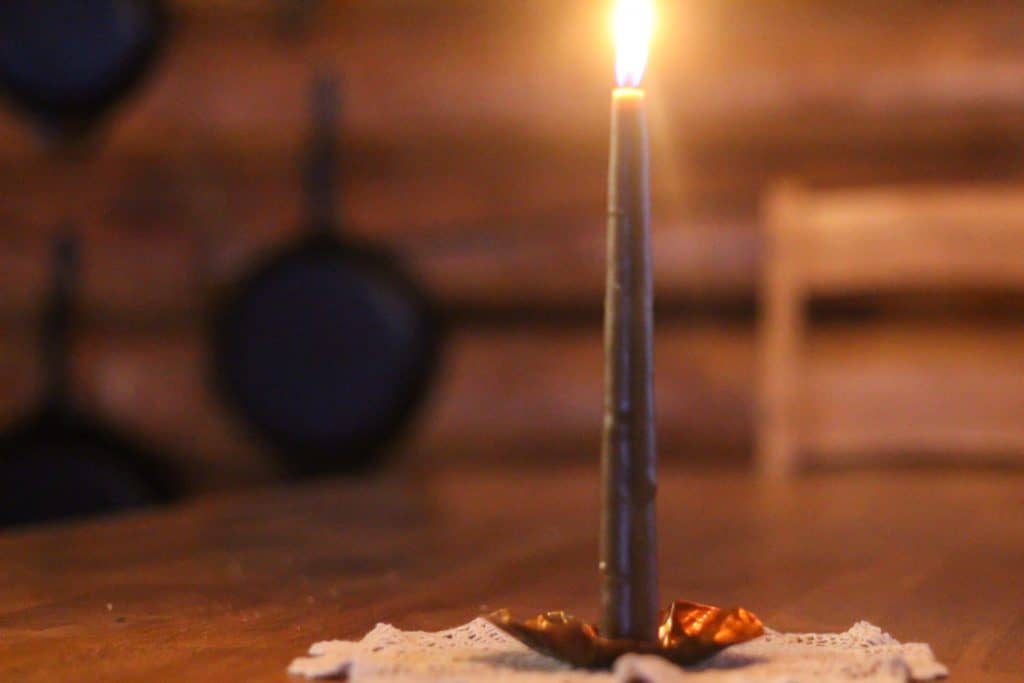
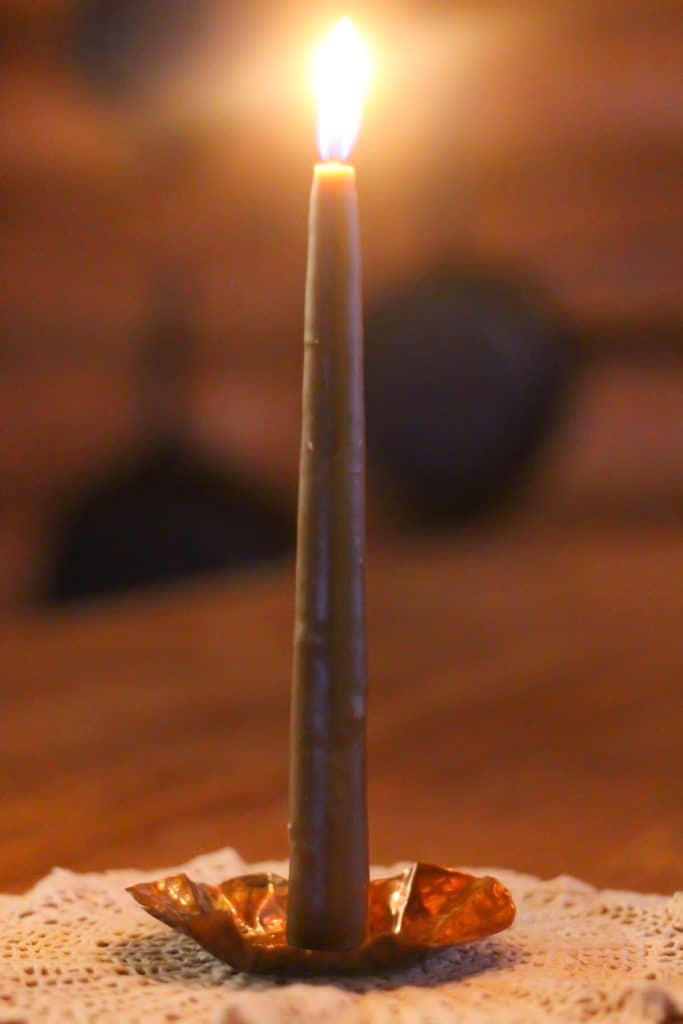
Allow the candles to completely cool for at least 24 hours before lighting them. Now they’re all done and ready for use or put on display! The color of your candles will vary depending on the wax you are using.
When you’re ready to light one of your own beeswax candles, trim the wick down to right above where the wax stops.
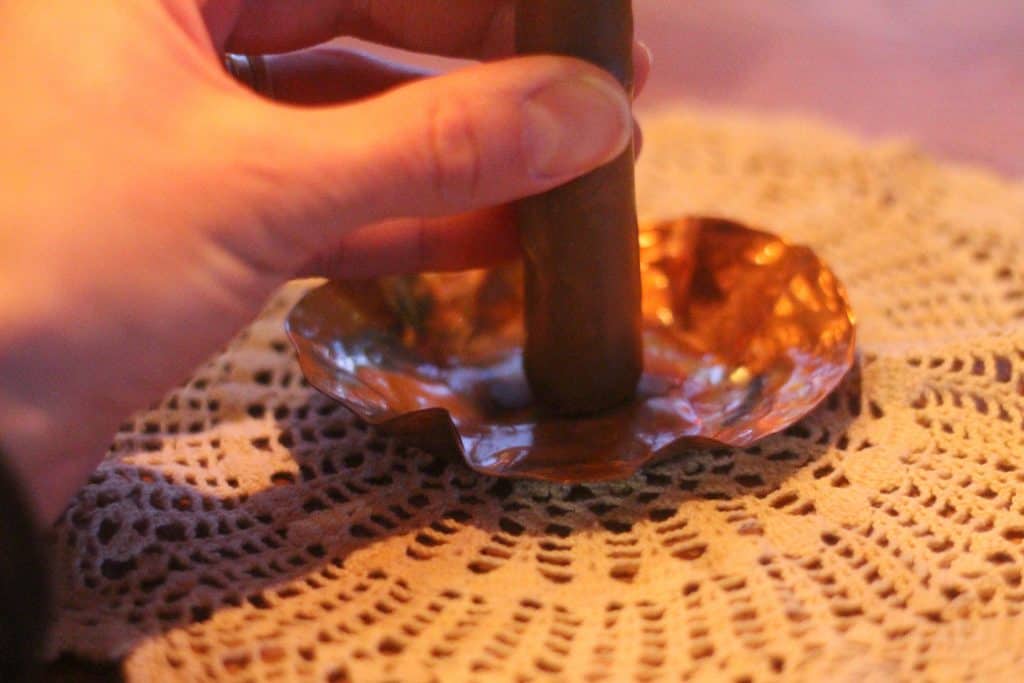
Taper candles can be difficult to measure to the correct thickness for using a candle holder. Here’s a trick!
Any dish or small container can become a candle holder. Simply light your candle and allow several drops of wax to drip off into a little puddle on your container of choice.
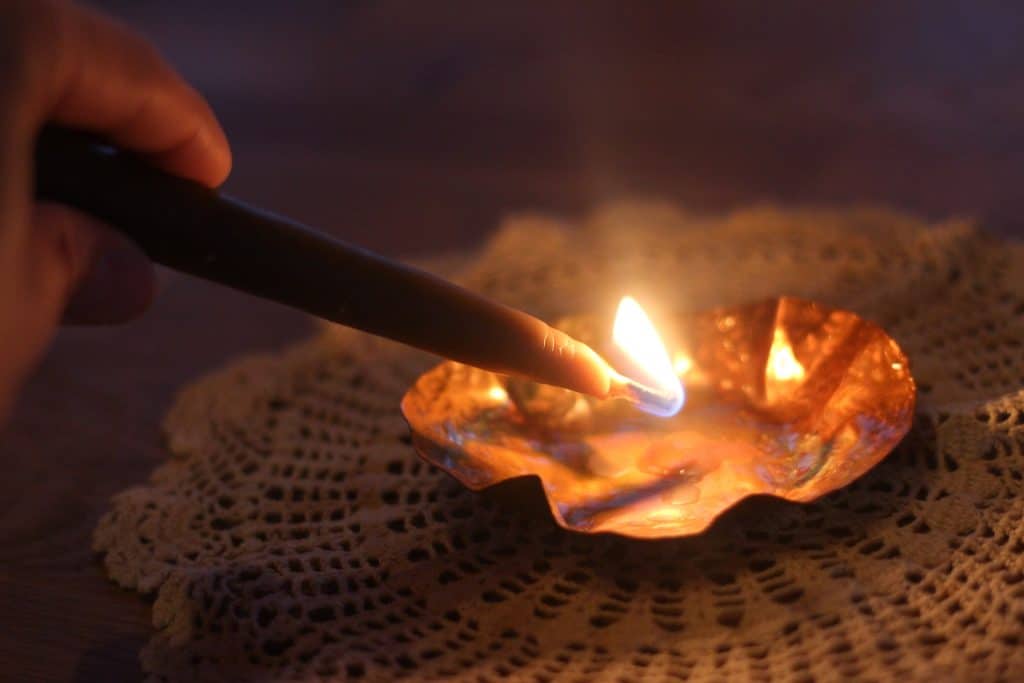
Then press the bottom of the candle into the melted wax. It will dry pretty quickly and the candle will be held in place!
Making beeswax-tapered candles is a really enjoyable activity with a beautiful and useful result. Hang the candles for a lovely decoration and simply cut them apart when you’re ready to use them.
Keep one in your car during winter in case of an emergency. Make your home so much cozier this winter with hand-dipped candles glowing in the evenings.
If you enjoy beautiful hand-dipped beeswax candles, try making your own birthday candles! Find complete instructions for this simple process in this post and start a fun tradition in your family. And check out this post for all of my favorite candle-making supplies.
Beeswax Tapered Candles
Equipment
- Countertop burner
- Large stock pot
- 2 Large glass jars or metal cans
- Pair of scissors or large knife
Materials
- Beeswax, cleaned and roughly chopped into cubes
- Good-quality wick
- Hex nuts
Instructions
- Fill the pot with water and place on countertop burner, bring to a simmer.
- Place one large glass jar or metal can into the pot of water and place the wax in it. Keep the water simmering and monitor the wax while it melts.
- While waiting, cut the wick into 36 inch long pieces and tie a hex nut to each end.
- Fill the other glass jar or metal can with cold water and place next to the burner.
- Once the wax is completely melted, begin dipping. Hold the wick with both hands, making sure both ends that are hanging are equal length.
- For the first dip, quickly lower the hex nuts and wick down into the wax and quickly pull back up and out. Dip the same way into the water. Use your fingers to gently pull down on the hex nuts to make sure the wick is straight.
- Dip quickly down and up a second time and in the water again too. Use your fingers once more to make sure the wick is straight and there are no bends in it.
- Now continue to quickly dip the candles in the wax and then the water, going back and forth until the candles are the thickness you like, around 12 dips.
- Hang the candles up to cool for a few minutes then take them down and, using scissors or a large knife, cut off the bottom right above the hex nut.
- Use your fingers to gently mold the bottom of the candle and press it on a flat surface to smooth it out. Hang them back up to continue cooling.
- Take the end that was cut off and remove the hex nut to use again. Toss the wax back into the pot to be melted and used again as well.
- Continue making candles depending on how much wax you have. Allow to cool for at least 24 hours before lighting.
I love beeswax candles! This is such a good tutorial on how to make them yourself. Thanks for sharing! I can’t wait to try this myself.
These candles are gorgeous and your home looks so warm and inviting! Thank you for sharing, I can’t wait to try this!
Thanks, Savannah! You should definitely try it sometime, it’s a lot of fun!
Thank you, Hollyn! That’s so nice of you to say. That’s exactly the feeling we have about our home:) Enjoy making your own candles!
There is nothing better than beeswax candles and I have always been wanting to make my own tapers. Thank you for this super helpful post – now I don’t have any excuses any more 😉
Perfect I can’t wait to make these….
I completely agree Anja! I love the smell of pure beeswax:) And you’re welcome, have fun making them!
Great! I would be interested in what color your wax turns out to be!
I have always wanted to make candles at home, thank you for sharing this tutorial!
You’re welcome, Jamie! I hope you enjoy making some!
How did you get the brown color?
That’s just the natural color of the wax I was using! When you combine lots of pieces of wax, it will all just melt together and can be anywhere from a very light brown/cream to dark brown. It just depends on how the bees have used the wax! The older the wax, the darker it is because the bees have been walking all over it so the fresh wax that they cap their honey frames with is usually pretty light because it’s newer.