How to Chill Raw Milk
You got a cow, you milked it, now what?! Here’s some advice on how to chill raw milk safely and properly. This is how we do it along with a few other options for you!

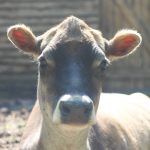
Owning a family milk cow comes with much responsibility. The list is a mile long of all of the details that you need to consider.
These details include feed, water, housing, healthcare, cost, equipment, and so on. You might not even know how to milk a cow, and that’s ok!
It’s an incredibly rewarding experience and the delicious, healthy milk that your family gets to enjoy is well worth all of the effort and cost.
But what do you do with that milk to make sure it’s safe and stays fresh? Proper handling of the milk once it comes out of the cow is very important.
At one time, and some are fortunate to still be able to do this now, milk jars were set in a spring and the constantly moving, cold water chilled the milk. For those of us without a natural source of running water, we must find another way!
Here’s some advice on how to chill raw milk and instructions for a simple, homemade milk chiller.

How to Handle Raw Milk After Milking
It’s important to begin chilling raw milk as quickly as possible. This means that once you’re done milking your cow and it’s safely returned to the pasture or stall, you need to take care of the milk before finishing the rest of your chores.
As soon as I’m done milking and we’ve moved the cows back to their pasture, I take the milk pail up to our garage, where I have a small milk parlor set up.
I remove my barn coat or whatever jacket I’m wearing that might have gotten dirty while I was down in the barn. Then I wash my hands thoroughly.
A small metal funnel and disposable milk filters are what I use to filter the milk. Half-gallon glass jars with plastic, leak-proof lids are my preference over gallon jars. They’re too large and take longer to chill the milk. I filter the milk into the jars, using a new filter for each jar.
I secure the lids on the jars then I wipe the jars off in case there are any milk drips. Finally, I label each jar with the date.
Now it’s time to chill the milk. Then I can return to the barn to finish cleaning up, giving the cows fresh hay, and any other chores that I need to complete.

How to Chill Raw Milk
It is recommended that raw milk be chilled to a temperature at or below 40 degrees F within 1 hour after milking for ultimate safety and freshness.
There are a few ways to chill raw milk at home:
- Refrigerator- You can place the jars of milk directly into the fridge but this method is not recommended. A fridge cannot cool the milk quickly enough to the recommended temperature.
- Freezer- Simply place the jars of milk into the freezer and keep them in there for at least one hour. Set a timer or you’ll forget and freeze and entire jar of milk. If you can jiggle the jars to swirl the milk around every 15 minutes that will help it chill faster.
- Cooler- Another method is to use a small cooler. This works well in the house. Get a small aquarium pump and stick it to the side of the cooler. Set the jars into the cooler. Add a couple of large ice packs or a few handfuls of ice to the cooler. Fill it with cold water from the sink. Turn on the pump and let it sit for 2 hours, jiggling the jars every half an hour if possible.
- Freezer Water Bath Milk Chiller- This is a great method for chilling raw milk at home! This gets the milk down to the recommended temperature at or below 40 degrees F within an hour every time. The freezing cold water moves constantly to chill the milk quickly, mimicking a natural spring. Read on for instructions on how to set up your own milk chiller at home.

How to Make a DIY Milk Chiller
You can easily set up your own raw milk chiller at home using a few supplies and very little time.
Supplies you will need:
- Small Chest Freezer- We use a 5.0 cubic feet chest freezer. It can fit up to 6 half-gallon jars at a time. We are usually only chilling 1 1/2-2 gallons of milk at a time (3 or 4 jars) so it’s just the right size for us. If you have a cow(s) that produce more milk, you might go with a larger freezer.
- Digital Temperature Controller- We use a digital temperature controller to control the temperature of the water in the freezer. It’s the same type we use when overwintering our bees.
- Aquarium Pump- An aquarium pump can be purchased at a pet store or online. We use this one and it works well. This makes the water move constantly to chill the milk faster and mimic a natural spring.

Plug in the freezer and connect it to the digital thermometer. The freezer plug should be in the outlet labeled “cooling”.
Set the temperature to 31-33 degrees F.

The thermometer end should be down in the water.
Attach the water pump to the side of the freezer and plug into a separate outlet.
Then fill the bottom portion of the freezer with clean water. Set one of the jars you use into the water to make sure it’s at the right level. The water should come up to the neck of the jar, just under the lid.

How to Use a DIY Milk Chiller
Once the water has reached the right temperature according to the thermostat, it’s ready to use! With the water chilled and the pump running, place milk jars into the water.
Set a timer for 1 hour. After an hour, use a clean kitchen thermometer to check the temperature of the milk. It should be below 40 degrees.
Move the milk to the fridge for storage where it should stay fresh for 2 or even 3 weeks. Make sure your fridge temperature is below 40 degrees F.

That’s it! Your raw milk will be chilled to perfection and you’ll taste the freshness! Off-flavors can often be caused by improper chilling of the milk.
I always wipe the jars off before I put them in the chiller but if I miss a drop of milk here or there, it will get into the water and can cause an odor over time. Just empty the water and add clean, fresh water. It’s a good idea to do this every week or two anyways.
With just a few supplies, you can set up a milk chiller of your own! Rapidly chilling raw milk is incredibly important when it comes to the safety and freshness of your family’s milk.