Completing a Hive Check in the Summer
The weather is warm and beautiful here in Alaska which means the honeybees are in full swing. They are busy pollinating, collecting nectar, and so much more. Completing a hive check in the summer is important for observing and managing hive health. Here are the steps we take to check on our bees.
Here in Alaska, the weather is warm and the sun is out all day and night. Plants are in bloom and all of this means that the honeybees are busy. Unless it’s a rainy day, anytime we look out our window at the hives they are bustling. There are bees everywhere and we just love seeing them.
We can see that our bees are doing alright just by watching from the outside but to really make sure that everything is as it should be, we need to see what’s happening on the inside as well. Completing a hive check in the summer is an important task for us as beekeepers so here’s some information about why and how we do it.
This post contains affiliate links, which means I make a small commission at no extra cost to you. See my full disclosure here.
Why Check on the Bees?
If the bees are buzzing and everything looks great, what’s the purpose of opening the boxes and actually checking on them? Although it is an option to just let the bees do their thing and never check them until you go to collect honey, we choose to keep an eye on our colonies to make sure they’re doing alright and so we can catch any issues and hopefully resolve them if needed.
Large colonies creating a new queen and then swarming is our main concern. As well as disease. Getting into the hive boxes to check on the bees helps us to avoid these potential problems. Since we overwinter our bees, we want to make sure they stay healthy and strong.
Do You Use a Smoker?
We have a smoker but only use it occasionally. We also keep a bottle of room temperature sugar water in a spray bottle. This can be used to mist the bees a little to calm them and keep them busy eating it up.
We will sometimes use the smoker later in the season when there are a lot more bees and we’re pulling frames out for honey extraction.
We have found that being calm and moving slowly is the best way to work with the bees. They are very in tune and can sense your mood. Being positive and comfortable while you’re completing the hive check will keep them fairly calm too. Move slowly, take your time, and don’t freak out when they start flying around you. This gets easier the more you work with them.
Checking the bees when the weather is nice is another factor. More bees will be out and about so there will be less to deal with when you open the box. Also, they won’t get as angry because the weather will be nice whereas a chilly, drizzly day would not make them happy!
Equipment to Have Ready
You should make sure that you have everything ready to go before beginning a hive check. Being unorganized and having to walk away to look for a tool will be disruptive. We keep a five-gallon bucket handy with everything that we use with the bees so all we have to do is grab it before we start a hive check.
Here’s what we keep in it:
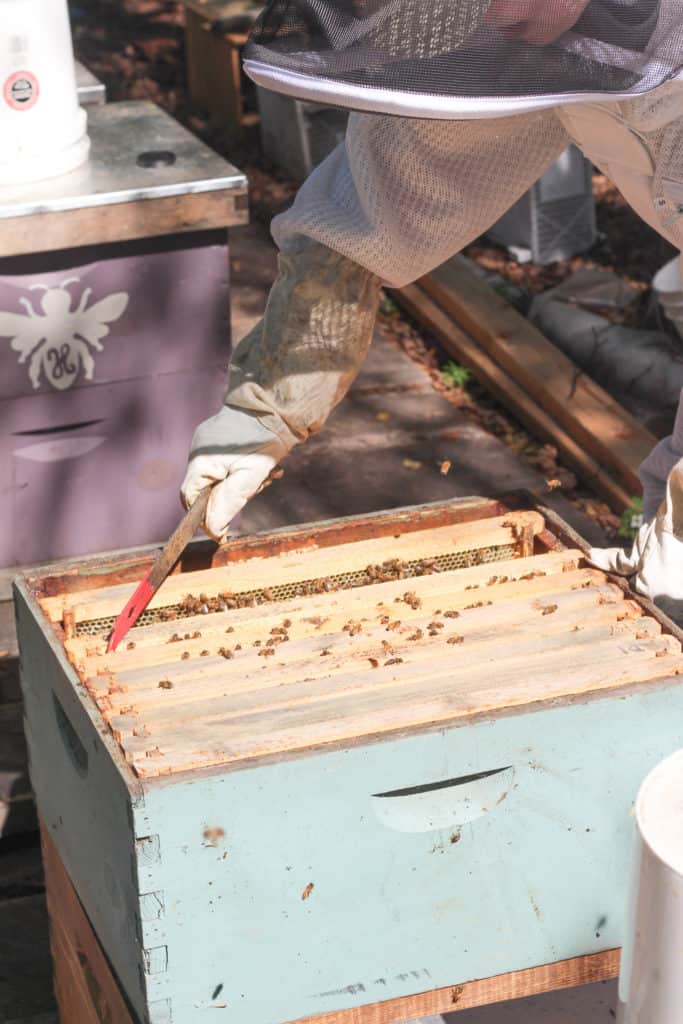
- Hive Tool-essential for separating frames and boxes as needed. Bees use propolis to glue their hives together and it’s very sticky. A hive tool will help to break the bond so you can grab the frames and pull them out. We keep two of these just in case. If we could only take one item with us to complete a hive check, this would be it!
- Smoker/Sugar Water Spray Bottle-As I mentioned before, we don’t use our smoker very often. But we keep in handy just in case.
- Frame Holder-This hooks onto the side of the hive box allowing you to hang the frames on it when you’re done checking them. We used to use this a lot but now we usually just gently set the frames down, leaning them against the hive box.
- Frame Grip-This is nice to have if you have a stubborn frame to pull out or if you’re having trouble gripping the frames with your bee gloves on.
Of course, have your bee suit in good condition and ready to go, along with good quality bee gloves. I always wear a baseball cap to help keep the hood of the bee suit off my face. We wear our Xtratuf boots to keep our feet safe as well.
Steps for Completing a Hive Check in Summer
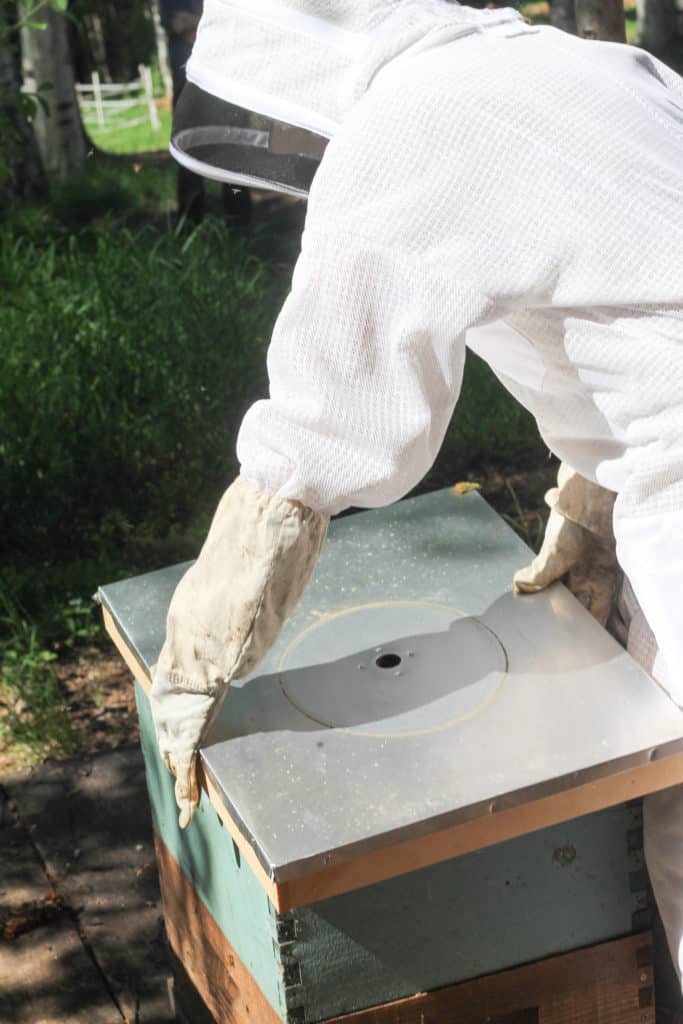
- Once you have your gear on and equipment ready, you’re all set to start checking on your hive. Removing the lid very carefully is the first step. Set it to the side where it won’t get in your way.
- Using the hive tool, gently separate the first outside frame. This one is the most difficult because the frames are packed in and there’s not much wiggle room until the first frame is removed.
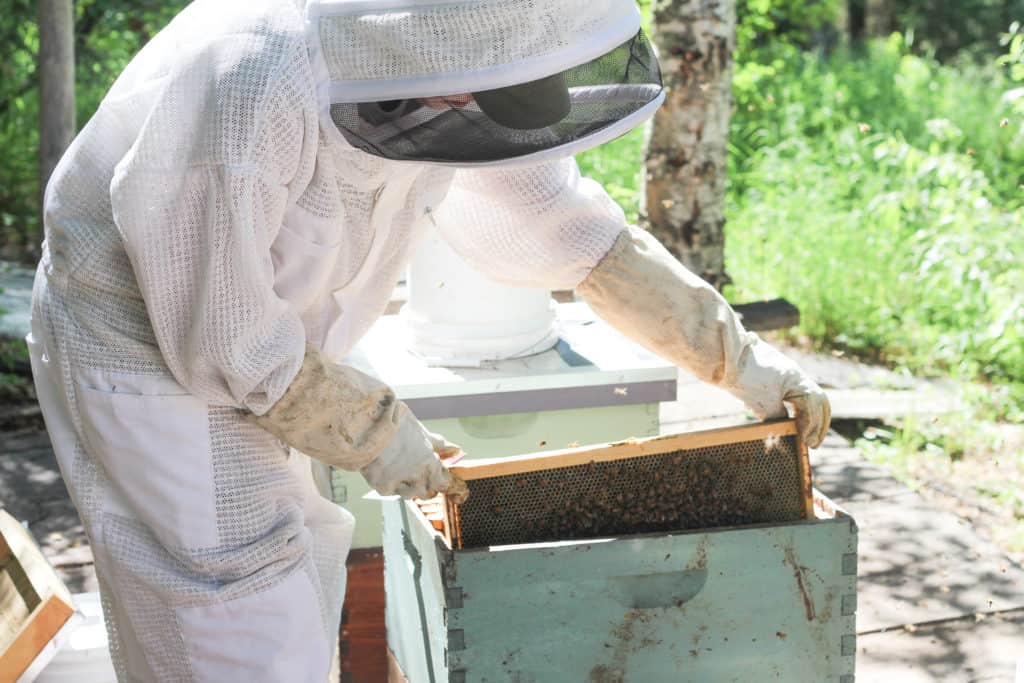
- Slowly pull the frame out and keep a tight grip so you don’t accidentally drop it.
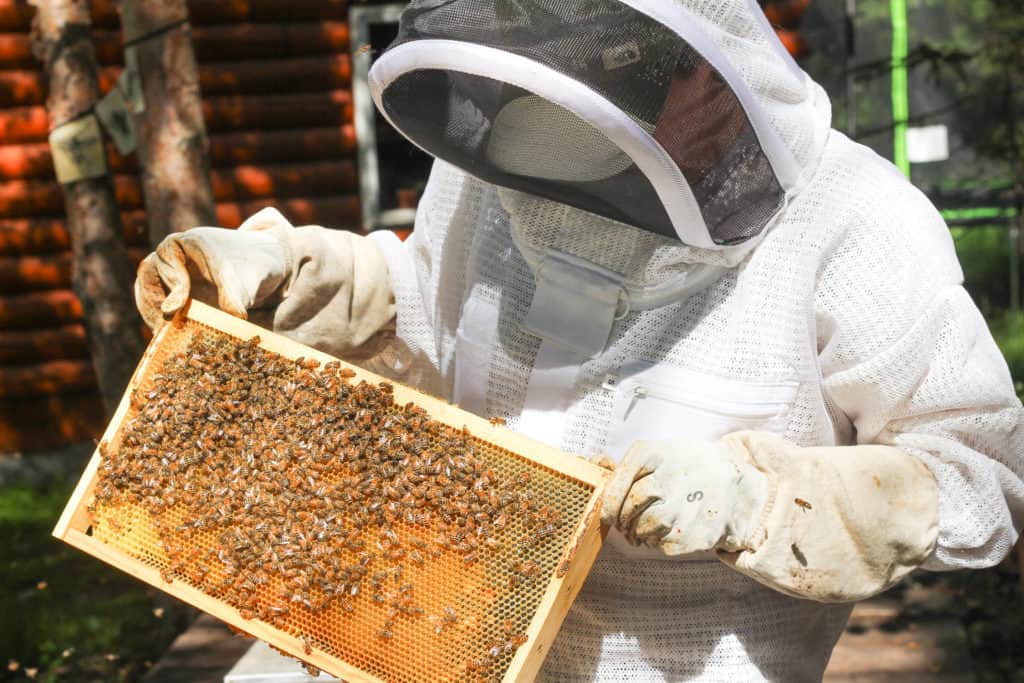
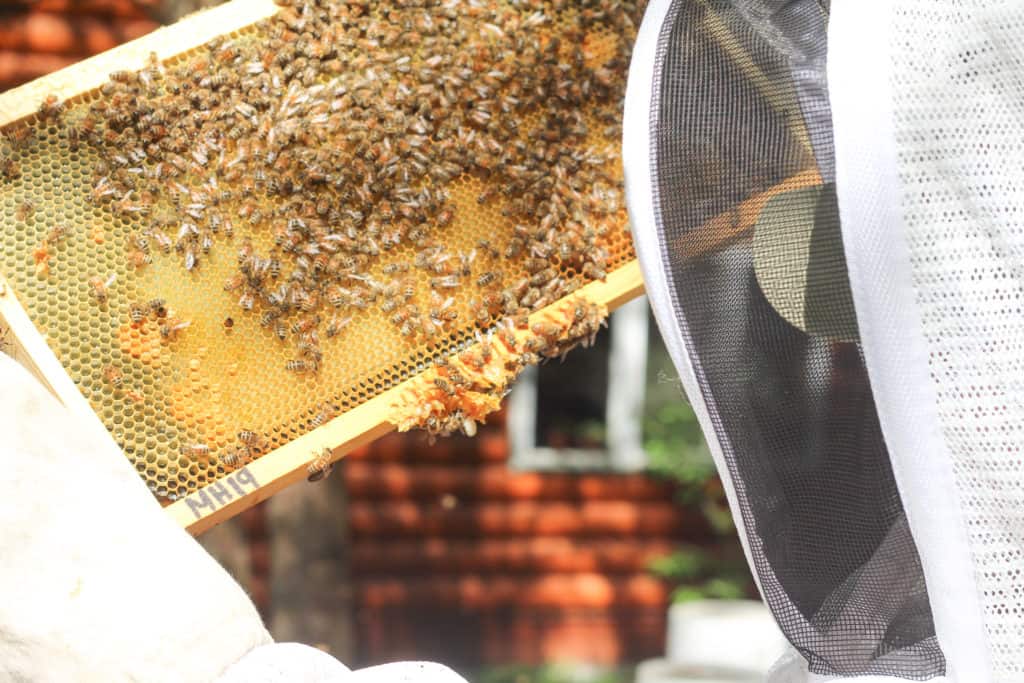
- Now the exciting part, looking at the frames! Examine each frame on each side and try to locate the queen. We look for signs of her including eggs, larva, and capped brood. Pollen stores and of course, bands of honey, are exciting to see as well. This frame below is mainly covered in capped brood which is great to see, it means more bees are on the way!

In this frame, you can see a lot of eggs. They look like a grain of rice. Even is we weren’t able to spot the queen, it’s obvious that she is alive and well.

It’s also important to check for queen cells. This is the main reason for completing regular hive checks during the summer. Queen (or swarm) cells are common but if they’re not caught, a new queen could hatch and your colony could swarm. You definitely don’t want that to happen so finding any queen cells and scraping them off is the main goal.
Use the hive tool to gently scrape away any queen cells or other comb that is not within the frame.

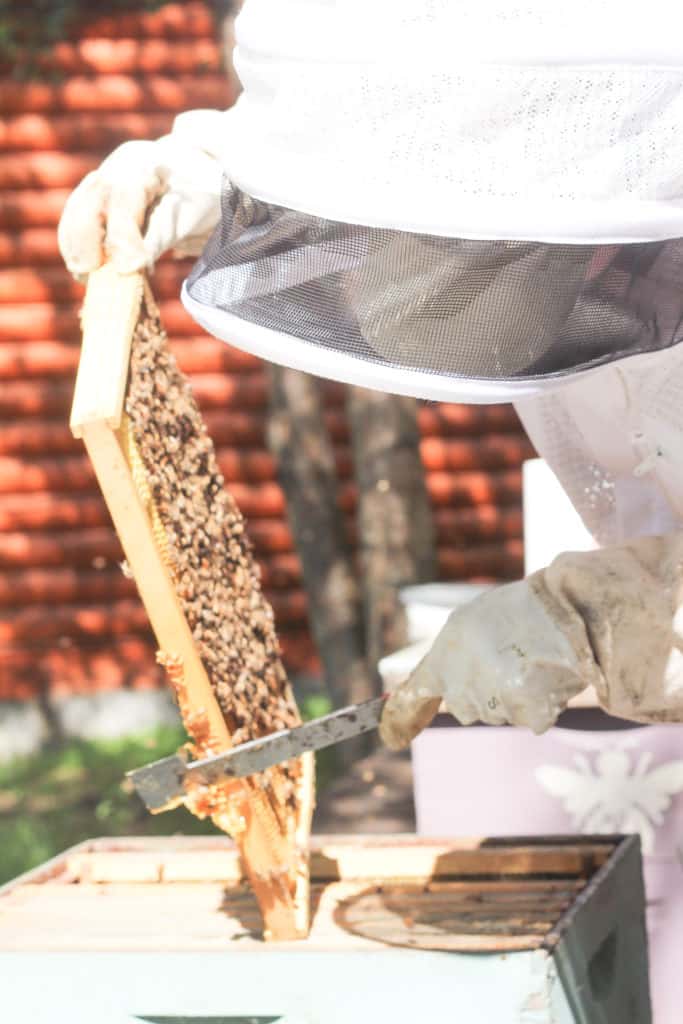
- After checking both sides of the frame, carefully set it down on the frame holder or on the ground, leaning on the hive box. After the first two or three frames, the remaining frames can just stay in the box and be pushed to the empty side while you check the rest of the frames.
- Use the hive tool to loosen the next frame and repeat the process. Working in order across the box, check each frame, continuing to look for the queen, signs of brood, and swarm cells.
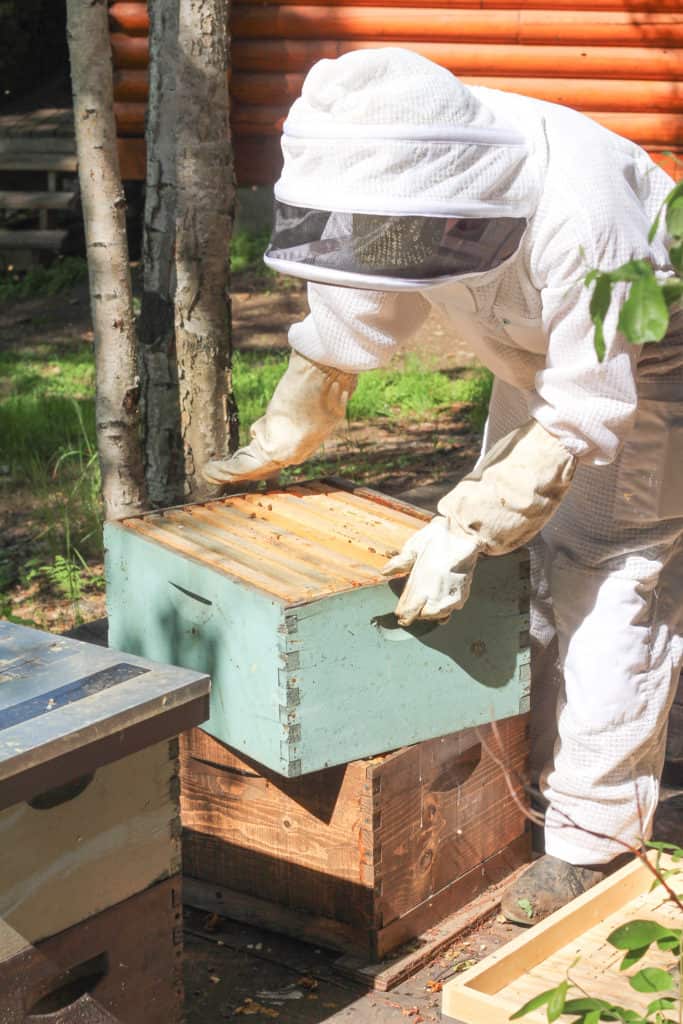
- After going through each frame, carefully place them back where they were one at a time. At this point in the season, there should be two brood boxes. After checking the top box, it must be picked up, placed off to the side, and the process repeated in the bottom box. If the queen was spotted on a frame in the top box, the bottom box will take less time since you know she’s not in there. But, you still want to check for queen cells and signs of a healthy colony.

- After checking the bottom box, the top box can be put back in its place and then the lid. The check is complete!
Some Tips for Completing a Hive Check in the Summer
- Remember to be calm and move slowly and smoothly. Enjoy yourself! It’s an amazing experience to see these incredible creatures up close. We love our bees and getting to see them up close.
- Some bees will die when you check on them, it’s inevitable. It’s sad, of course, but don’t let it upset you. Just keep going.
- Two of our daughters love helping with the bees so we include them when we do hive checks. Working together makes the process faster and more enjoyable.
Summer is the height of bee season, we look forward to it every year. We absolutely love beekeeping and having our own honey to enjoy and share with others. Completing hive checks in the summer is part of our role as caretakers of these important creatures.
Pin it for Later


